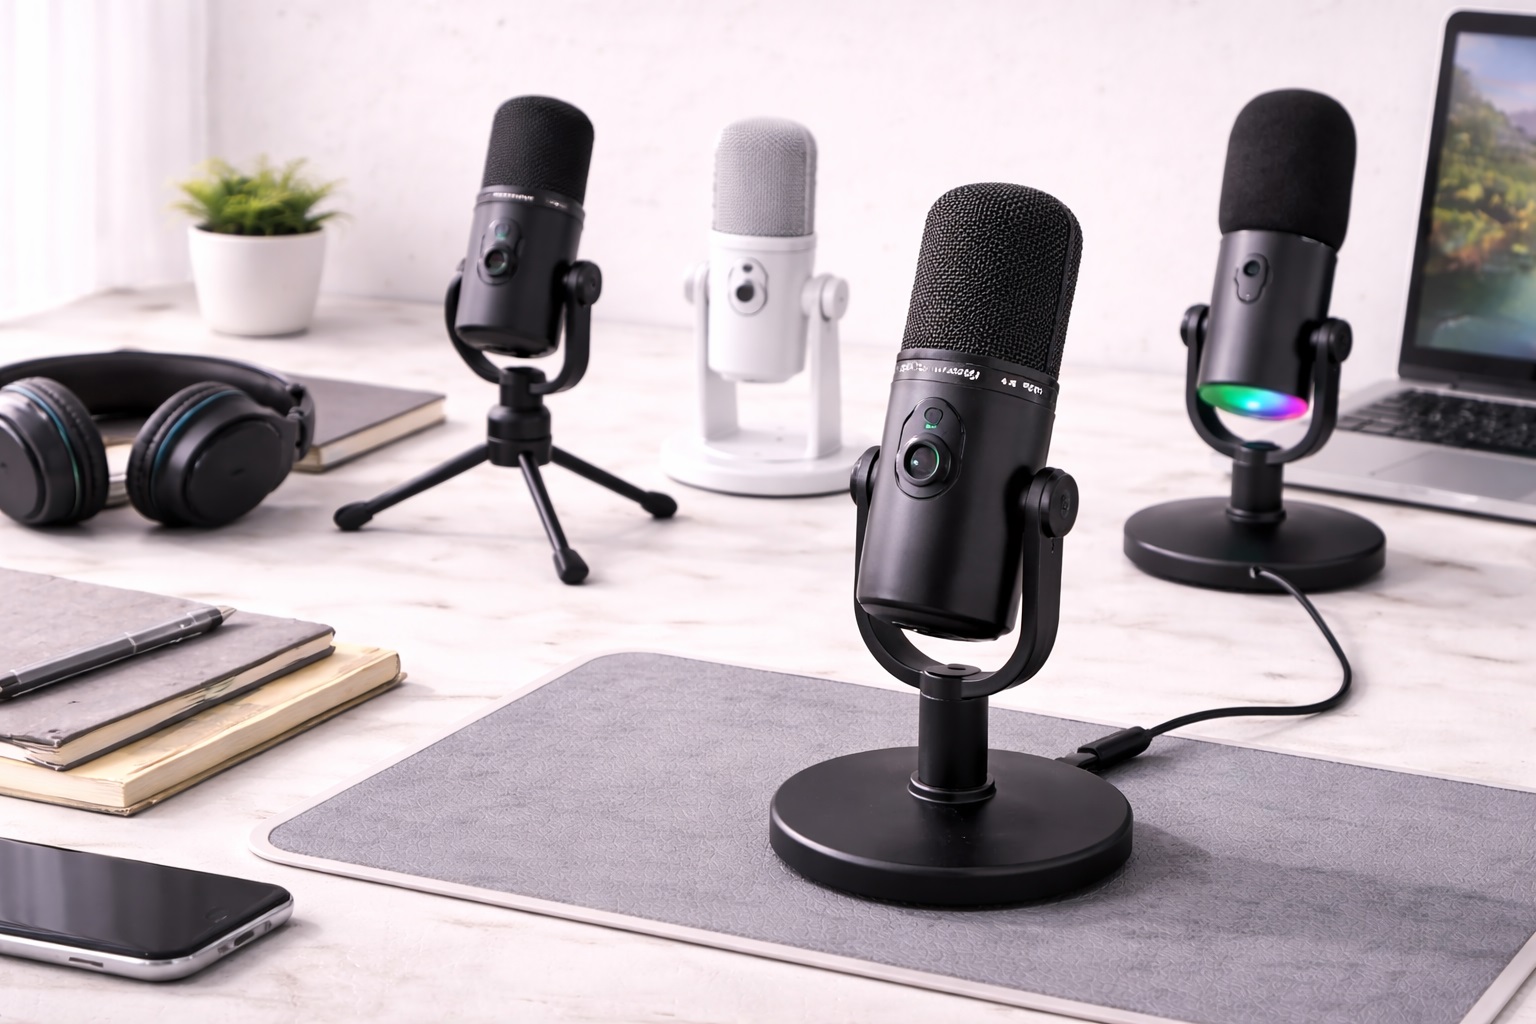
Best Microphones for Beginners: Easy Upgrades From a Webcam Mic
Most people don't think about their microphone until someone on a call asks them to repeat themselves for the third time, or a recording comes back sounding thin and tinny next to everyone else's. The built-in mic on a laptop or webcam is designed to be small and cheap to manufacture, not to sound good, and once you notice the difference, it's hard to unhear it. Built-in mics also tend to sit in the worst possible position — inside the laptop lid or webcam housing, aimed at your forehead rather than your mouth, and positioned right next to a fan and keyboard that add their own noise to every recording.
The problem for a first-time buyer is that microphone shopping looks a lot more technical than it needs to be. Spec sheets are full of numbers that mean little without context, and marketing copy tends to promise studio-quality sound from every product regardless of price. None of that helps you figure out which microphone actually fits your desk, your room, and the way you plan to use it. Add in dozens of near-identical listings with different brand names stamped on essentially the same hardware, and it's easy to spend an entire evening comparing products without becoming any more confident about which one to actually buy.
This guide skips the jargon overload and focuses on what actually changes the listening experience for someone buying their first dedicated microphone: how each design handles your room, how simple it is to set up, and where each option runs out of usefulness. Rather than reviewing dozens of near-identical products, it breaks the decision down into the three microphone types that matter most for beginners, so you can match the right category to your situation instead of guessing from a spec sheet. Each category below solves a slightly different version of the same underlying problem, and knowing which problem you actually have — a noisy room, a cluttered desk, or a need to stay mobile during calls — narrows the field considerably before you even look at individual products.
It also helps to be realistic about what a first microphone is actually for. Most beginners aren't trying to build a broadcast studio on day one — they're trying to sound clear and professional on a work call, or to stop a podcast episode or voice memo from sounding like it was recorded in a stairwell. Keeping that goal in mind makes the shopping process much simpler, because it rules out an entire tier of advanced, XLR-based equipment that's genuinely aimed at a different kind of buyer. A beginner's needs are specific and modest: clear intelligible speech, an easy setup process, and reasonable durability, rather than the flattest possible frequency response or the widest dynamic range on the market.
Top 3 Microphones for Beginners (Detailed Reviews)
1. USB Condenser Microphone – Best Overall for Beginners
A USB condenser microphone is usually the first serious upgrade recommended to anyone leaving a laptop mic behind, and for good reason. The condenser capsule is more sensitive than a dynamic one, which means it picks up more detail, warmth, and presence in your voice without any extra hardware. Because it connects straight into a USB port, there's no audio interface, no driver hunting, and no cable puzzle to solve before your first recording. A cardioid pickup pattern, standard on almost every model in this category, focuses on whatever is directly in front of the capsule and quietens sound coming from behind it. Setup is typically a single step: plug the mic into a USB port, select it as the input device in whatever app you're using, and you're recording. There's nothing to configure beyond that, which is exactly what a first-time buyer wants from a piece of new equipment.
- Pros:
- Noticeably more detailed and natural voice capture than any laptop or webcam mic
- True plug-and-play setup with no interface or extra software required
- Cardioid pattern keeps the focus on your voice and away from the room
- Recognized instantly by Windows, macOS, and every major conferencing app
- Cons:
- Picks up more of your room's echo and hum than a dynamic mic would
- Best results depend on a reasonably quiet space to record in
Best For: First-time buyers with a reasonably calm room who want the biggest possible jump in voice quality for calls, streaming, or casual recording.
Why We Recommend It: This is the category that gives beginners the clearest before-and-after difference. Nothing else at this stage of the buying journey improves how you sound as immediately or as noticeably as swapping a laptop mic for a dedicated USB condenser. Colleagues and friends on the other end of a call are often the first to comment on the change, usually without you needing to mention that you upgraded anything at all.
2. Dynamic USB Microphone – Best for Noisy or Untreated Rooms
A dynamic USB microphone trades some of that condenser sensitivity for tolerance. Because the capsule needs more energy to respond, it naturally ignores more of what's happening around it — a working dishwasher, a housemate's TV, traffic outside a thin window. That makes it a sensible first microphone for anyone who doesn't have a quiet room to record in and isn't planning to add acoustic treatment any time soon. Modern dynamic USB models still sound clearly better than a laptop mic for calls and streaming, even without a condenser's extra detail. Because the design tolerates a less-than-ideal room, it also tends to be more forgiving of small positioning mistakes, which matters if you're still learning where to sit and how loudly to speak.
- Pros:
- Rejects background noise and room reflections far better than a condenser
- Performs consistently in untreated bedrooms, kitchens, and shared spaces
- Generally sturdier build than condenser designs at a similar price
- Forgiving of imperfect rooms, which suits most first apartments and dorms
- Cons:
- Captures slightly less high-frequency detail than a condenser microphone
- Needs you to sit a little closer to the capsule for the best result
Best For: Beginners recording or calling from a noisy household, a shared room, or any space without soft furnishings to absorb echo.
Why We Recommend It: A dynamic mic won't out-detail a condenser in a treated studio, but almost nobody buying their first microphone has a treated studio. In a real bedroom or living room, it frequently sounds better simply because it ignores what a condenser would faithfully capture.
3. Clip-On Lapel Microphone – Best for Video Calls on the Move
A clip-on lapel microphone solves a different beginner problem: staying close enough to a mic while you're not sitting still. Because it clips to a collar or shirt just inches from your mouth, distance and positioning stop being variables you need to think about. Most USB lapel mics come with a long enough cable to reach a laptop from a normal seated or standing position, and there's no desk stand or arm to find room for. This makes it a natural fit for a beginner who doesn't yet have a permanent desk setup, or who splits time between a kitchen table, a couch, and a proper desk depending on the day.
- Pros:
- Stays close to your mouth automatically, so voice pickup stays consistent
- Proximity to the mouth naturally reduces how much background noise gets picked up
- Uses no desk space at all, useful on a cramped or shared workspace
- Small and light enough to toss in a bag without a second thought
- Cons:
- Doesn't match a condenser or dynamic mic for outright audio quality
- The clip and cable can be visible on camera depending on where you attach it
Best For: Beginners whose calls involve movement, gesturing, or presenting rather than sitting still in front of a desk mic.
Why We Recommend It: The advantage here isn't raw fidelity, it's consistency. A lapel mic keeps working exactly as well whether you lean back, turn to grab something, or stand up to point at a screen, which a stationary desk mic can't promise.
Buying Guide: How to Choose the Best Microphone for Beginners
Once you know roughly which category fits your situation, these are the details worth checking before you commit to a specific model. None of them require technical audio knowledge — they're simply the questions a first-time buyer should ask before clicking purchase. Working through them in order, from biggest impact to smallest, is a reasonable way to prioritize your attention if you're comparing several listings side by side.
1. Start With Your Room, Not the Spec Sheet
Before comparing individual products, think honestly about where you'll actually be recording. A quiet home office with carpet and curtains behaves very differently from a shared bedroom with hard floors and a housemate's TV two walls away. Your room, more than any single spec, determines whether a condenser or dynamic design will sound better in practice. Take a minute to actually listen to your space: clap once and notice how long the sound lingers, or record a ten-second voice memo on your phone and play it back. A noticeable echo or hiss tells you more than any manufacturer's marketing copy will.
2. Understand Cardioid, Omnidirectional, and Figure-8 Patterns
Almost every beginner mic uses a cardioid pattern, which picks up sound from the front and rejects it from behind — the right default for one person speaking or recording alone. Omnidirectional mics pick up everything around them equally, which suits multi-person conference use but adds unwanted room noise for solo work. Figure-8 patterns capture front and back, a niche fit for two people facing each other. For a first microphone, cardioid is almost always correct. If a listing doesn't specify a pattern at all, it's worth checking the product description or manual before buying, since an omnidirectional beginner mic in a noisy home can be a frustrating surprise.
3. Decide Between Condenser and Dynamic Early
This single decision affects your experience more than any other spec on the page. Condensers sound more detailed but expose room noise; dynamics sound slightly less detailed but hide it. If you're not sure which describes your space, lean dynamic — most beginners underestimate how much their room affects a condenser recording. It's also fine to change your mind after a week of use — most people only discover which category actually suits them once they've recorded a few real sessions rather than a quick test in the store.
4. USB Is the Right Connection Type for Almost Everyone Starting Out
USB microphones need nothing beyond the mic itself and a spare port. XLR microphones need a separate audio interface, additional cables, and usually phantom power, which adds cost and a small learning curve. Unless you already know you want to build a more advanced setup later, USB is the sensible first purchase. XLR is worth revisiting only once you have a concrete reason for it, such as recording multiple people through a mixer or building a home studio around a specific piece of software.
5. Don't Pay Extra for Specs You Won't Use Yet
Most USB microphones record at 48kHz/16-bit, which is more than sufficient for voice, calls, and casual streaming. Higher sample rates and bit depths matter far more for music production than for spoken voice, so a beginner rarely needs to prioritize them. Save that budget for build quality or a better capsule instead. A microphone advertised primarily on its high sample rate, without much said about its capsule or noise handling, is often prioritizing the wrong spec for a voice-focused buyer.
6. Check the Self-Noise Rating If It's Listed
Self-noise is the faint electronic hiss a microphone adds even when nothing is being recorded, measured in decibels. Anything under 20dB is good for voice work; above 30dB can become audible during quiet pauses. Some budget-focused beginner mics simply don't publish this figure, which is itself worth noting when comparing two similarly priced options. If self-noise isn't listed anywhere, treat it as a small unknown rather than a dealbreaker, and lean on verified customer reviews mentioning hiss or hum instead.
7. Physical Gain Control Beats Digging Through Software
A hardware gain knob lets you adjust input sensitivity instantly, which matters if your voice varies in volume or your room has moments of extra noise. Not every beginner mic includes one — some rely entirely on software-based gain adjustment in your operating system or conferencing app, which works but is slower to reach mid-call. Neither approach is wrong, but if you expect to record in varied environments — quiet at night, noisier during the day — a physical knob will save you repeated trips into your operating system's sound settings.
8. Zero-Latency Monitoring Is Convenient, Not Essential
A headphone jack built into the mic lets you hear your own voice back in real time with no digital delay, which is genuinely useful for podcasting or music recording. For someone whose main use is video calls or occasional voice memos, this feature adds cost without adding much practical benefit. It's a reasonable feature to deprioritize on a first purchase, and one you'll know whether you actually miss after a few weeks of regular use.
9. The Included Stand Is Usually Enough to Start
Almost every USB microphone ships with a basic desk stand, and for casual calls and recording, that's genuinely sufficient. A boom arm gives more precise, repeatable positioning and frees up desk space, but it's an upgrade worth adding later once you know how you actually use the mic day to day. There's little reason to buy one on day one unless your desk is already extremely cramped or you know you'll want the mic positioned overhead rather than in front of you.
10. Consider Shock Isolation Near a Keyboard
If your mic sits close to a keyboard or a desk you tend to bump, vibrations can transmit straight into the recording as low, dull thuds. A shock mount — built in or added separately — isolates the capsule from that kind of physical noise, which is a small but meaningful upgrade for a busy desk. Even a basic foam or rubber isolation mount is enough to solve this for most people, and it's an inexpensive add-on if your chosen mic doesn't already include one.
11. Real Rooms Beat Spec Sheets Every Time
A dynamic cardioid mic positioned six inches from your mouth will reject more background noise than a condenser sitting eighteen inches away, no matter what either product's marketing claims. When you're comparing two mics on paper, remember that your actual seating distance and room will matter more than any published number. Reviews that describe real-world use — a specific room, a specific distance — are usually more useful for this decision than a manufacturer's lab-condition claims.
12. Set a Realistic First-Mic Budget
You don't need to spend heavily to notice a dramatic improvement over a built-in mic — the jump from webcam audio to any dedicated USB microphone is the biggest single upgrade you'll make. It's reasonable to start modestly and only spend more once you've identified exactly what you'd want from a second microphone. Think of a first purchase as a way to learn what actually matters to you — quiet-room detail, noise rejection, or hands-free mobility — rather than a final, once-and-for-all decision.
Frequently Asked Questions
1. Do I need any extra equipment beyond the microphone itself?
No. USB microphones aimed at beginners are designed to work with nothing more than the mic, its included cable, and a free USB port on your computer. There's no audio interface, phantom power supply, or mixer required. If you later want a boom arm, pop filter, or shock mount, those are optional add-ons rather than requirements for basic use.
2. Will a beginner microphone work with Zoom, Teams, and Google Meet?
Yes. Every USB microphone is recognized as a standard audio input device by Windows, macOS, and every mainstream video conferencing app. You simply select it from the audio settings menu instead of your laptop's built-in mic. Most apps default to your system's chosen input device automatically, so once you set it in your operating system's sound settings, individual apps usually pick it up without further changes.
3. How far should I sit from my new microphone?
Most USB condenser mics sound best at roughly six to twelve inches away, angled slightly off-axis rather than speaking straight into the capsule, which helps avoid harsh popping sounds on words with a hard "p" or "b". Moving closer boosts bass and cuts more background noise if your room is loud. It's worth spending a few minutes on your first day adjusting distance and angle while listening back to a short recording, since the right position is easy to find but rarely obvious on the first try.
4. Does the room I'm in actually make a difference?
It makes a significant difference, especially with a condenser mic. A bare room with hard walls and floors reflects sound back into the capsule, adding an echo that makes even a good microphone sound unpolished. Soft furnishings — rugs, curtains, a bed, upholstered furniture — noticeably reduce that effect. You don't need to treat an entire room; even hanging a blanket behind your recording position or facing a bookshelf can measurably cut down on echo.
5. Can one beginner microphone handle both calls and casual recording?
Yes. A USB cardioid microphone comfortably covers both. For calls, you just select it as your input device; for recording or streaming, you may want to fine-tune gain and positioning, but it's the same microphone doing both jobs without compromise. There's no need to own separate microphones for separate purposes at the beginner stage.
6. Should I automatically buy the most expensive option?
No. Price tends to track extra features — additional pickup patterns, onboard controls, premium build materials — rather than a guaranteed leap in core voice quality. For a first microphone, matching the category to your room matters more than chasing a higher price tag. Two mics at very different prices can sound remarkably similar for plain voice recording, with the gap mostly showing up in build materials, bundled accessories, and software extras.
7. How long should a beginner-focused microphone last?
A well-built USB microphone from an established brand typically lasts several years of regular use. Check the warranty length before buying — it's usually the clearest signal of how confident a manufacturer is in their own build quality. One or two years of coverage is common; anything shorter is worth a second look before you commit.
8. What if the microphone I choose doesn't suit my setup?
Keep the original packaging until you're confident in your purchase. Most retailers allow returns within roughly 15 to 30 days, which gives you enough time to test the mic in your actual room and routine before the return window closes. Testing it on a real call or an actual recording session, rather than just plugging it in briefly, gives a much more honest sense of whether it fits your needs.
9. Is a dynamic or condenser mic better for a total beginner?
It depends entirely on your room rather than your experience level. A quiet, furnished room favors a condenser's extra detail; a noisy or bare room favors a dynamic mic's noise rejection. Neither is objectively more beginner-friendly — the right choice is the one that matches your space. If you genuinely can't decide, a dynamic mic is usually the safer default, since it fails more gracefully in an imperfect room.
10. Do I need to install drivers or special software?
Generally no. USB microphones aimed at beginners are class-compliant, meaning your operating system recognizes them automatically without extra downloads. Some brands offer optional companion apps for advanced tuning, but they're rarely required for normal use. If a companion app is offered, it's usually there for convenience — saving custom EQ or gain presets — rather than being necessary to get the microphone working at all.
11. Does brand reputation matter for a first microphone?
It matters more for support and warranty reliability than for raw sound quality at the beginner tier. Established audio brands tend to offer clearer documentation and better customer service if something goes wrong, but newer brands can still offer solid value — reading verified reviews before buying is worth the extra few minutes. Pay particular attention to reviews mentioning long-term reliability rather than just first impressions out of the box.
12. Will I need to upgrade again soon after buying my first microphone?
Most beginners are satisfied with a solid USB condenser or dynamic mic for years, especially for calls, casual streaming, and voice recording. The next upgrade tier — XLR microphones and audio interfaces — is really aimed at users developing a more specific, advanced production need, not a natural next step for everyone. If you do eventually outgrow your first mic, it will usually be because you've discovered a specific new use case — multi-guest podcasting, music recording, or professional broadcast work — rather than a general dissatisfaction with everyday sound quality.
Final Verdict
- Best Overall for Beginners: USB Condenser Microphone – the clearest, most noticeable upgrade from a laptop or webcam mic in a reasonably quiet room.
- Best for Noisy or Untreated Rooms: Dynamic USB Microphone – the most forgiving option for shared spaces, dorms, and untreated home environments.
- Best for Video Calls on the Move: Clip-On Lapel Microphone – the most consistent choice for anyone who moves, gestures, or presents during calls.
There's no single "correct" first microphone — there's only the one that matches your room and how you actually plan to use it. Match your situation to one of the three categories above, and the specific model becomes a much easier decision than it looked at first glance.
Whichever category you land on, remember that the biggest single improvement in your audio quality has already happened the moment you move away from a built-in laptop or webcam mic. Everything covered in this guide — pickup pattern, room treatment, gain control, mounting — is about refining that improvement further, not chasing an elusive perfect setup. Start with the option that matches your actual room and calling habits, spend a week or two using it normally, and you'll have a much clearer sense of what, if anything, you'd want from a future upgrade.