Best Monitor Arms for Beginners: Easy Setup, Better Ergonomics Immediately
A first monitor arm purchase comes with a specific kind of hesitation that experienced buyers don't usually think about: will it actually go together correctly, will the instructions make sense, and will the monitor end up secure rather than wobbling on a half-tightened bolt. None of that uncertainty is unreasonable. Monitor arms look mechanically simple in product photos, but the actual installation involves choosing the right VESA screws, threading cables through a pole, and getting a clamp seated correctly on a desk edge that may not be a perfectly standard shape. Reading a handful of reviews or watching an unboxing video ahead of time can settle a lot of that uncertainty before a purchase is even made.
The good news is that several monitor arm styles are specifically forgiving of a first attempt. Pre-assembled spring-tension arms arrive mostly built, needing only a clamp attachment and a VESA plate screwed to the monitor. Fixed-height mounts remove the adjustment mechanism entirely, trading flexibility for a setup that's nearly impossible to get wrong. Even the more capable gas spring and dual-arm designs have become considerably more approachable over the years, with clearer instructions and fewer loose parts than older designs required.
There's also a difference between the arm itself being complicated and the beginner simply lacking familiarity with the general process. Once someone understands that a VESA plate connects the monitor to the arm, that a clamp secures the base to the desk, and that cables generally route down through or alongside the pole, nearly every monitor arm on the market starts to look like a variation on that same basic pattern rather than an entirely new puzzle to solve each time. That underlying pattern rarely changes between brands, which is part of why the second monitor arm someone installs almost always goes faster than the first.
This guide focuses specifically on what makes a monitor arm approachable for someone setting one up for the first time — not just which arm has the most features, but which one minimizes the chances of a frustrating first attempt and gets a monitor properly positioned with the least amount of trial and error.
It also helps to set realistic expectations before ordering. Even the simplest monitor arm still requires reading through a short set of instructions, attaching a VESA plate to the back of the monitor, and securing a base to the desk. None of these steps are difficult individually, but doing them in the right order and taking a few extra minutes to double-check each connection before tightening everything down avoids the vast majority of first-attempt frustrations that beginners report. Rushing through the instructions to get to the finished result faster is usually where avoidable mistakes creep in.
Price is a smaller factor in this particular buying decision than it might be for a more experienced buyer chasing a specific adjustment range or premium build material. A beginner is usually better served by paying attention to setup complexity and instruction quality first, then comparing prices only among the options that already look approachable to install. Overpaying for adjustment range that goes unused is a common early mistake worth avoiding on a first purchase.
Top 4 Monitor Arms for Beginners (Detailed Reviews)
The four picks below represent different approaches to the same beginner-friendly goal, from arms that arrive nearly pre-assembled to designs that intentionally limit adjustment in exchange for foolproof setup. Considering which trade-off matters most — flexibility, simplicity, or a guided installation process — makes the choice between them much clearer. None of the four requires advanced technical skill, but each asks for a slightly different amount of patience and a different number of steps between opening the box and having a finished setup.
1. Pre-Assembled Spring-Tension Monitor Arm – Best Overall for Beginners
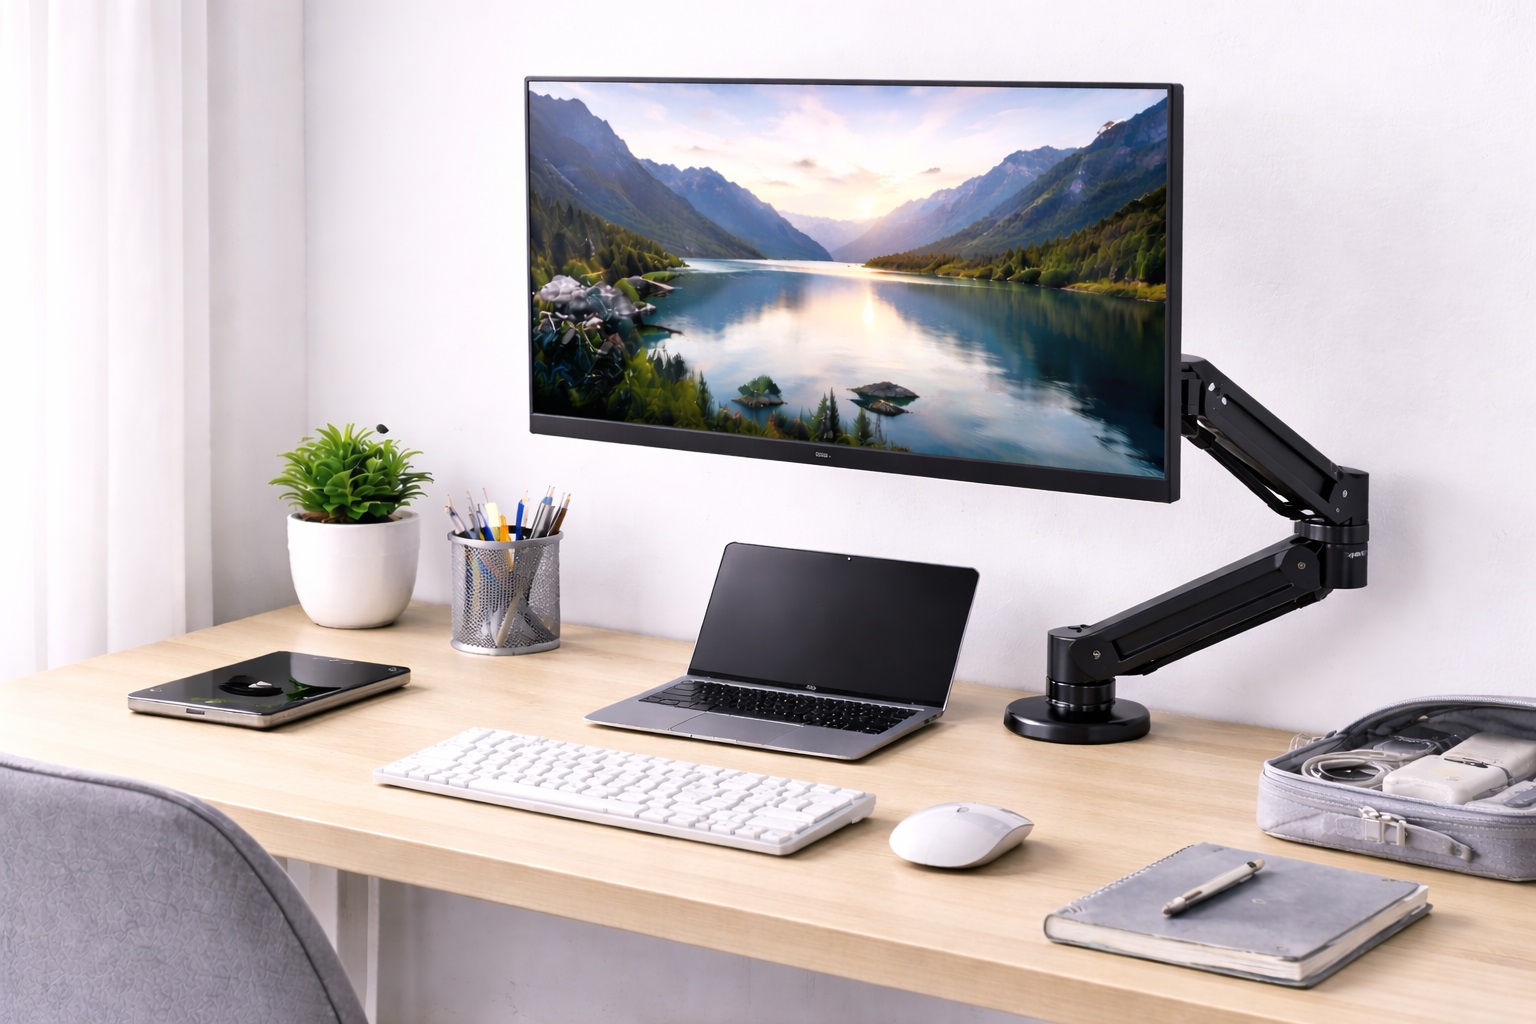
A spring-tension monitor arm uses an internal coil or leaf spring rather than a pressurized gas cylinder, and most models ship almost fully assembled, with only the desk clamp and VESA plate needing attachment. This significantly reduces the number of steps between opening the box and having a working setup, which matters most for someone who has never assembled hardware like this before.
Spring-tension arms also tend to include clear, numbered instructions with illustrations rather than dense technical diagrams, since manufacturers in this category specifically target buyers who want a straightforward experience. The adjustment tension is usually factory-set to work reasonably well with common monitor weights out of the box, meaning a beginner doesn't need to manually calibrate spring resistance the way some gas spring arms require during initial setup.
The overall footprint of this style also tends to be modest, since spring-tension arms are typically built as single-joint or dual-joint designs rather than the more complex multi-joint assemblies found in premium gas spring arms. Fewer joints means fewer connection points to align during setup, which directly translates into a shorter, less error-prone installation process for someone doing this for the first time. It also means fewer places where a loose connection could later develop, which is reassuring for a buyer who isn't yet confident inspecting hardware for wear.
- Pros:
- Ships mostly pre-assembled, reducing setup steps
- Clear, illustrated instructions are standard in this category
- Factory-set tension works for most common monitor weights immediately
- VESA compatible with most standard monitors
- Cons:
- Less refined adjustment feel than a premium gas spring arm
- Spring tension may need occasional manual adjustment as it settles
Best For: First-time buyers who want the shortest path from unboxing to a working, adjustable monitor arm without extra calibration steps.
Why We Recommend It: The combination of minimal assembly and beginner-oriented instructions removes most of the friction that makes a first monitor arm purchase intimidating, while still delivering genuine height and angle adjustment.
2. C-Clamp Single Monitor Arm – Best for Tool-Free Installation
A C-clamp monitor arm attaches to the desk edge with a hand-tightened or hex-key clamp rather than requiring a drilled hole through the desk. For a beginner, this removes one of the more intimidating steps in monitor arm installation entirely — there's no permanent modification to get wrong, and if the clamp is positioned incorrectly the first time, it can simply be loosened and repositioned without any lasting consequence.
Because the clamp mount doesn't require measuring and drilling a hole at a precise location, the margin for error during installation is considerably wider than with a grommet-mounted arm. This makes it a natural starting point for someone unfamiliar with monitor arm installation, since even an imperfect first attempt can be corrected in seconds by loosening the clamp and adjusting its position.
The clamp mechanism itself is also usually operated with a single hex key or a hand-turned screw, rather than requiring multiple tools or a specific torque to seat correctly. That simplicity extends to disassembly as well — if the arm needs to move to a different desk later, taking it down is just as straightforward as putting it up, which is reassuring for someone who isn't yet confident committing to a permanent setup. That same reversibility also makes the clamp style a sensible pick for anyone renting or expecting to relocate within the next year or two.
- Pros:
- No drilling — clamp installation is fully reversible
- Mistakes during setup can be corrected instantly
- Works on rented, shared, or temporary desks
- VESA compatible with most monitors
- Cons:
- May not fit unusually thick or thin desk edges
- Slightly less rigid than a grommet-mounted arm under a heavy monitor
Best For: Beginners who want the lowest-risk installation method, with no permanent desk modification and an easy path to correct mistakes.
Why We Recommend It: The forgiving nature of clamp mounting makes this the safest entry point into monitor arms, since there's effectively no way to install it incorrectly in a way that can't be quickly fixed.
3. Fixed-Height VESA Monitor Mount – Best for a Foolproof Setup
A fixed-height mount holds the monitor at a single set height and angle, without the adjustable joints, springs, or tension mechanisms found in articulating arms. This dramatically simplifies both installation and daily use, since there's no adjustment mechanism to learn, calibrate, or accidentally loosen. The monitor is positioned once during setup and stays there.
For a beginner specifically concerned about doing something wrong, removing the adjustment mechanism removes an entire category of potential mistakes. There's no spring tension to set, no gas cylinder to worry about weakening, and no adjustment joint that can be left loose. The setup process is limited to attaching the VESA plate and securing the mount to the desk, which is the simplest possible version of a monitor arm installation.
The main planning step with this style is deciding on the correct height and angle before installing, since there's no mechanism to correct the position afterward without redoing the mount. Measuring seated eye level against the desk height ahead of time, rather than guessing during installation, is the one extra step worth taking seriously with a fixed mount specifically, and it's a step that takes only a few minutes with a tape measure and a chair.
- Pros:
- Simplest possible setup — no adjustment mechanism to configure
- Nothing to loosen, weaken, or recalibrate over time
- Typically more affordable than articulating arms
- Still removes the monitor stand's desk footprint
- Cons:
- No height or angle adjustment after initial setup
- Requires getting the mounting height right the first time
Best For: Beginners who know roughly where they want their monitor positioned and would rather have a permanently correct setup than ongoing adjustability.
Why We Recommend It: Removing the adjustment mechanism entirely eliminates the most common source of beginner frustration with monitor arms — fiddling with tension or joints that won't hold position correctly.
4. Dual Monitor Arm with Guided Setup – Best for Beginners Upgrading to Two Screens
Some dual monitor arms are specifically designed with beginners in mind, including labeled parts, step-by-step printed guides, and a single shared base that reduces the number of separate mounting points to manage. Rather than assembling two entirely separate single arms, a beginner-friendly dual arm consolidates the more complex parts of the installation — the clamp and the vertical pole — into one guided process.
This matters for someone setting up their first dual-monitor workstation, since the temptation to skip ahead or improvise during assembly is much lower when the instructions clearly sequence each step. Both monitors still adjust independently once installed, so the beginner-friendly setup doesn't come at the cost of losing the flexibility that makes a dual arm worthwhile in the first place.
Because two monitors and two VESA plates are involved, taking the installation one screen at a time rather than trying to attach both simultaneously tends to go more smoothly for a first attempt. Getting the first monitor fully mounted and adjusted before starting on the second keeps the process manageable and makes it easier to spot a labeling mistake before it compounds. Treating the whole project as two smaller installations rather than one large one tends to keep the experience from feeling overwhelming.
- Pros:
- Step-by-step guided assembly designed for first-time installation
- Single base simplifies mounting compared to two separate arms
- Independent adjustment for each screen once assembled
- Removes two monitor stands' worth of desk clutter
- Cons:
- More assembly steps overall than a single-monitor arm
- Heavier and pricier than a single spring-tension or fixed mount
Best For: First-time monitor arm buyers who are also setting up a dual-monitor workstation for the first time and want clear, sequenced installation guidance.
Why We Recommend It: Consolidating a naturally more complex dual-screen installation into a single guided process makes an otherwise intimidating first project considerably more approachable.
Buying Guide: How to Choose the Best Monitor Arm for Beginners
Beyond the usual specifications that matter for any monitor arm, a few additional factors matter specifically for someone installing one for the first time. Weighing these alongside the standard buying criteria makes the entire experience less stressful, and going through them roughly in order before comparing specific products tends to narrow the field quickly.
1. Quality of Included Instructions
Clear, illustrated, step-by-step instructions make the single biggest difference in a beginner's installation experience. Look for product listings that specifically mention illustrated manuals or numbered assembly steps, since instruction quality varies considerably between manufacturers even for mechanically similar arms. A manual that separates each step onto its own page, rather than cramming several steps into one dense diagram, is usually a good early sign.
2. Number of Loose Parts
Arms that ship mostly pre-assembled reduce the chances of losing a small screw or misplacing a spacer during setup. Checking whether the arm requires full assembly from separate components or arrives with the pole and joints already connected gives a good sense of how involved the setup process will actually be. Product photos showing the arm already assembled in the box are a useful clue worth checking before ordering.
3. Reversibility of the Mounting Method
Clamp mounts can be repositioned or removed without consequence if the first attempt isn't quite right, while grommet mounts require drilling a hole that can't be easily undone. For a first monitor arm, a reversible mounting method removes the pressure of getting the exact position correct on the first try, which lowers the stakes of the entire installation considerably.
4. VESA Compatibility
VESA mounting requires a grid of four holes on the back of the monitor, most commonly spaced 75x75mm or 100x100mm. Nearly all monitor arms support both patterns, but checking the monitor's back panel before purchasing avoids the disappointment of an incompatible mount after everything else has been set up, including cables run and desk space cleared.
5. Weight Capacity Margin
Choosing an arm with a weight capacity comfortably above the monitor's actual weight, rather than right at the limit, gives a beginner more forgiving adjustment behavior and reduces the chance of the arm drifting or sagging slightly after installation. This margin also reduces the odds of needing to troubleshoot subtle stability issues later on.
6. Adjustment Mechanism Simplicity
Gas spring arms offer the smoothest adjustment but sometimes require setting tension correctly during initial setup. Fixed-height mounts and pre-tensioned spring arms remove that calibration step entirely, which can be the better choice for someone who wants to avoid fine-tuning a mechanism they've never used before. Reading a few reviews that mention tension adjustment specifically can help set expectations before buying.
7. Cable Management Simplicity
Internal cable routing channels look cleaner but can be fiddly to thread cables through during a first setup. External cable clips are easier to work with initially, even though they look slightly less tidy, which can be a reasonable trade-off for a first attempt. Cable management can always be revisited and tidied up later once the arm itself is working correctly.
8. Desk Edge Compatibility
Clamp-mounted arms specify a maximum desk thickness they can grip. Measuring the desk edge before ordering avoids the frustrating situation of receiving an arm that doesn't fit properly, which is a common early setback for first-time buyers and one of the more avoidable mistakes with a few minutes of measuring beforehand.
9. Return Policy and Setup Support
Brands that offer a generous return window and accessible customer support are worth prioritizing for a first purchase, since a beginner is more likely to need help troubleshooting an unfamiliar assembly step than an experienced buyer would be. A brand with responsive support can turn a confusing moment into a quick fix rather than an abandoned project.
10. Video Guides and Online Support
Many manufacturers now provide installation videos alongside printed instructions. Checking whether a product has a video guide available can be a deciding factor for visual learners who find printed diagrams harder to follow than a demonstrated installation, especially for steps like threading cables through an internal channel.
11. Adjustment Range Versus Simplicity Trade-off
A beginner should honestly weigh whether they need extensive height, tilt, and depth adjustment or whether a simpler, more limited mount would serve just as well. Choosing more adjustability than needed only adds setup complexity without a corresponding daily benefit, and that extra complexity is exactly what a first-time buyer benefits from avoiding.
12. Community Reviews From Other First-Time Buyers
Reviews that specifically mention ease of setup, rather than only long-term durability, are more useful for a beginner trying to gauge how approachable a particular arm will be. Looking for reviews that describe the actual unboxing and installation experience, including any missteps the reviewer ran into, helps set realistic expectations before the box arrives.
Frequently Asked Questions
1. Do I need any special tools to install a monitor arm?
Most monitor arms include the hex keys and screws needed for installation. A basic Phillips screwdriver is sometimes needed for the VESA plate attachment. No specialized or power tools are typically required for clamp-mounted arms, which is part of why this category is approachable even for someone without a home toolbox.
2. How long does it take a beginner to install a monitor arm?
A first installation typically takes thirty to forty-five minutes, somewhat longer than the fifteen to twenty minutes an experienced installer might need, mostly due to reading through instructions carefully and double-checking each step before proceeding. Budgeting extra time rather than rushing tends to lead to a smoother result.
3. What's the easiest type of monitor arm to install for a first attempt?
Fixed-height mounts and pre-assembled spring-tension arms are generally the easiest, since they involve the fewest components and the least calibration. Clamp-mounted versions of either style further simplify the process by avoiding any drilling, which removes the step beginners tend to find most intimidating.
4. Can I damage my monitor while installing a monitor arm myself?
The risk is low if the VESA screws included with the arm are used rather than substituting longer screws, which can damage internal components. Following the manufacturer's screw length recommendations and not overtightening avoids the most common installation mistakes, and most included hardware is already matched to standard monitor depths.
5. What if I install the clamp in the wrong spot on my desk?
Clamp mounts can simply be loosened, repositioned, and retightened without any lasting effect on the desk. This is one of the main advantages of clamp mounting over grommet mounting for a first-time installation, since there's no need to get the exact position right before committing.
6. Do beginner-friendly monitor arms sacrifice quality for simplicity?
Not necessarily. Many beginner-oriented arms use the same core materials and VESA compatibility as more complex designs — the difference is primarily in assembly complexity and instruction quality rather than build quality itself, so simplicity doesn't have to mean a lower-quality product.
7. Should a beginner start with a single arm or go straight to a dual arm?
Starting with a single arm is generally the more approachable choice, since it involves fewer parts and a simpler learning curve. A beginner-friendly dual arm with guided setup is a reasonable alternative for someone confident they want two screens from the start and comfortable with a slightly longer installation process.
8. Is the most expensive beginner monitor arm always the easiest to install?
Not necessarily. Price often reflects adjustment range and material quality rather than ease of setup specifically. Some mid-range arms are actually simpler to install than premium gas spring models with more calibration steps, so price alone isn't a reliable proxy for setup difficulty.
9. How do I know if my monitor has VESA mounting holes?
Check the back panel for four threaded holes arranged in a square pattern, typically 75mm or 100mm apart. If no such pattern exists, a VESA adapter bracket may add compatibility, though not every monitor shape supports one cleanly, so confirming compatibility with the specific model is worth doing first.
10. What should I do if the monitor still wobbles after installation?
A small amount of wobble usually means a joint or clamp needs to be tightened slightly further. If wobble persists after tightening, the arm may be under-rated for the monitor's actual weight, which is worth checking against the arm's listed specifications before assuming something was installed incorrectly.
11. Can I return a monitor arm if the installation doesn't go smoothly?
Most retailers offer a standard return window, commonly two to four weeks. Keeping the original packaging during setup preserves that option if the arm proves too difficult to install or doesn't fit the desk as expected, so it's worth holding onto the box until the arm is fully working.
12. Does brand reputation matter for a first monitor arm purchase?
Established brands generally offer clearer instructions, more accessible customer support, and more consistent build quality, which matters more for a first-time buyer who may need help troubleshooting an unfamiliar setup step than for someone who has installed several arms before.
Final Verdict
- Best Overall for Beginners: Pre-Assembled Spring-Tension Monitor Arm – the shortest path from unboxing to a working, adjustable setup.
- Best for Tool-Free Installation: C-Clamp Single Monitor Arm – the lowest-risk, fully reversible mounting method.
- Best for a Foolproof Setup: Fixed-Height VESA Monitor Mount – the simplest possible installation with nothing to calibrate.
- Best for Beginners Upgrading to Two Screens: Dual Monitor Arm with Guided Setup – the clearest path into a first dual-monitor workstation.
Whichever of the four ends up being the right fit, the underlying goal stays the same: a monitor that sits at a comfortable height without requiring a second attempt to get there.
A first monitor arm doesn't need to be the most feature-rich option available — it needs to be one that installs correctly on the first attempt and holds a monitor securely afterward. Prioritizing clear instructions, a forgiving mounting method, and an appropriate weight margin over raw adjustment range turns what can feel like an intimidating purchase into a straightforward upgrade.
Once that first arm is installed successfully, choosing a more advanced one later becomes a far less daunting decision, since the basic mechanics of VESA mounting, cable routing, and desk clamping will already be familiar. Many buyers who start with a simple, beginner-friendly arm end up comfortable enough after a few months to consider a more capable gas spring or dual-monitor setup for their next upgrade, having already learned the fundamentals on a lower-stakes first purchase.